We feature items we believe will benefit our audience. If you purchase through links on this page, we may earn a small commission. Here’s how we do it.
So, have you ever had one of those makeup moments that ended up looking like a disco ball exploded in your face? Yeah, me too. Especially when it comes to glitter makeup!
Last New Year’s Eve, I was determined to have the sparkliest eye look ever. I piled on the glitter, feeling like a glamorous queen…until I blinked. Turns out, all that glitter ended up hiding in the crease of my hooded eyes, making me look less like a party queen and more like a raccoon who got into the craft supplies.
Let’s be real, glitter makeup and hooded eyes can be a tricky combo. The glitter tends to disappear into the fold, leaving you with just a sad, shimmery smudge. But ditch the drama! There are ways to make glitter work for us, and I’m here to share all the tips and tricks. We can totally achieve those stunning, sparkly looks without the fallout. So, grab your glitter and get ready to unleash your inner Cher (the fabulous kind, not the raccoon kind)!
Table of Contents
Hold Up, Are My Eyes Hooded? Let’s Decipher the Dilemma!
Before we discuss glitter makeup, let’s chat about hooded eyes. You might be wondering, “Am I in the hooded eye club?” Well, it’s super easy to find out: when you open your eyes wide, does the fold of your eyelid seem to cover part of your crease? If you answered yes, then welcome to the club!
Here’s the thing about hooded eyes – they’re beautiful, but they can definitely throw some shade (literally) at our makeup routines. Some common struggles we face include:
- The Crease Charade: Our creases like to play hide-and-seek with eyeshadow, making it disappear into the fold.
- The Fallout Fiasco: Glitter? More like a “glitter-everywhere-but-my-lids” situation. Those sparkly flecks love to migrate, leaving us looking like we got caught in a glitter bomb.
- The Shrinking Lid Syndrome: Hooded lids can make our eyes appear smaller. Where’d all that eyeshadow real estate go?
Glitter Galore: Unveiling the Sparkling Squad!

First things first, let’s talk about the glitter itself! Because guess what? There’s a whole world of sparkly goodness for every eye shape waiting to be explored.
The Glitterati: Different Types of Glitter Eyeshadow
When it comes to glitter makeup or eyeshadow, you’re not limited to just one kind. We have a whole squad of sparkly options, each with its own unique personality:
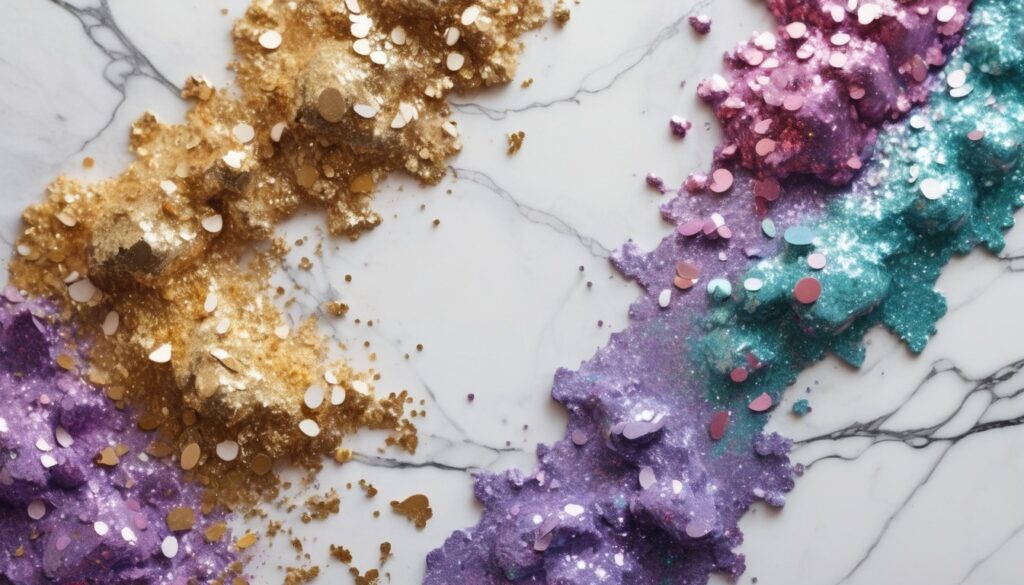
Loose Glitter
This is the OG of the glitter makeup world. Think tiny, free-floating flecks of sparkle that bring the ultimate high-impact look.
- Pros: Super intense sparkle, customizable application.
- Cons: Fallout city! Requires a glitter primer for maximum staying power. Application can be a bit messy.
- Tips: Use a damp brush or your fingers for a foiled effect. Clean up any fallout with a sticky tape trick!
- Brand Recommendations: Hourglass Scattered Light Glitter Eyeshadow ($30), NYX Professional Makeup Loose Glitter Pigment ($6.50)
Liquid Glitter
This is your one-stop shop for a smooth, high-shine look. It glides on easily and dries down with minimal fallout.
- Pros: Easy to apply, minimal mess, long-lasting wear.
- Cons: May not be as intensely sparkly as loose glitter.
- Tips: Apply with a not-too-thick flat eyeshadow brush or your finger for even coverage. Layer it for extra intensity.
- Brand Recommendations: Urban Decay Heavy Metal Glitter Eyeliner ($28), Stila Glitter & Glow Liquid Eyeshadow ($12).
Pressed Glitter
This combines the best of both worlds: the sparkle of loose glitter with the ease of a pressed eyeshadow.
- Pros: Easy to apply, less messy than loose glitter, offers a buildable level of sparkle.
- Cons: May not be as intense as loose glitter.
- Tips: Use a damp brush for a foiled finish or a dry brush for a sheer wash of glitter.
- Brand Recommendations: ColourPop Gel Glitter Eyeshadow ($10.50), MAC Dazzleshadow Liquid ($13).
Struggling with eyeshadow fallout and creasing? In this article, we explore why liquid eyeshadow might be your new holy grail product, and share 7 top tips for flawless application. Read More!
Glitter Makeup Station: Prep The Workspace
Before we dive into the basics of hooded-eye glitter makeup application, let’s get our workspace prepped! Trust me, a little organization can go a long way in preventing glitterageddon (a sparkly disaster, obviously).
Think you’re hyped to create a killer glitter makeup look, but then your makeup brushes are MIA and your eyeshadow palette is buried under a mountain of random beauty products. Not exactly the vibe we’re going for, right?
Here’s the thing, having a clean and organized makeup area not only saves you time and frustration, but it also helps keep your products (and your skin!) happy.
Essential Tools for Hooded Eye Success
Now, onto the fun part – the tools! To achieve flawless glitter makeup on hooded eyes, you’ll need a few key players:
- Eyeshadow Primer: This is your glitter insurance policy. It creates a smooth base that helps your glitter eyeshadow stick around all day (or night) without creasing.
- Flat Eyeshadow Brush: This flat hero is perfect for packing on glitter pigment, especially for a foiled effect.
- Angled Eyeliner Brush: This will be your best friend for creating precise lines and defining your crease.
- Fluffy Blending Brush: Don’t forget the magic of blending! A fluffy brush helps soften harsh lines and diffuse the glitter for a more natural, diffused look.
- Cotton Swabs and Micellar Water: Because glitter has a mind of its own sometimes. These will be your lifesavers for cleaning up any glitter makeup fallout.
Speaking of cleaning, don’t forget to sanitize your makeup brushes regularly! Dirty brushes can harbour bacteria, which is a major no-no for your skin. Special brush cleansers are available, but a gentle shampoo or soap and water can do the trick too. Just make sure to dry them completely before using them again.
Prime Time: Prepping Your Hooded Eyes!
Now let’s prep those beautiful hooded eyes. Here’s the thing, even the most dazzling glitter needs a good foundation (literally and figuratively) to truly shine.
Think about it like this: You wouldn’t build a skyscraper on sand, right? The same goes for glitter makeup. We need a smooth, prepped canvas for our sparkly masterpiece.
Keeping Your Lids Hydrated
Let’s talk moisture. Dehydrated eyelids are like a recipe for creasing and patchiness, which is not the look we’re going for. So, grab a gentle eye cream and tap it lightly onto your eyelids. Just a pea-sized amount is enough!
Tip: Apply your eye cream after your moisturizer but before your primer.
Glitter Grip: Priming for Perfection
Now, onto the star of the show – the eyeshadow primer! It’s like a double-sided tape for your glitter makeup. It creates a smooth base that helps your glitter eyeshadow adhere better, preventing it from creasing and fading throughout the day.
Here’s how to apply it like a pro:
- Dot, Dot, Dot: Dab a small amount of primer (think a tiny rice grain size) onto your eyelid with your finger or a flat eyeshadow brush.
- Spread the Love: Gently pat and blend the primer outwards towards your brow bone and crease. Don’t forget to prime your lower lash line if you plan to add some sparkly goodness there too!
- Let it Shine: Give the primer a few seconds to dry completely before applying your eyeshadow.
Choosing the Right Tools: Primers for Hooded Eyes
Not all primers are created equal, especially when it comes to hooded eyes. Look for primers that are:
- Long-wearing: You want your glitter to last all night, not disappear after an hour.
- Mattifying: This helps control oil production, which can cause creasing.
- Lightweight: A heavy primer can weigh down your hooded lids, making them appear even smaller.
Brand Recommendations: Urban Decay Eyeshadow Primer Potion ($18), Milani Eyeshadow Primer ($6).
Tired of midday meltdowns? My guide to matte foundations helps you find the perfect fit for oily skin. Read more here!
Saving Your Under-Eyes: Defense Against the Glitter Gremlins!

We’ve prepped our lids, chosen our glitter, and are ready to create some serious sparkle. But before we go to town, there’s one crucial step we can’t forget: protecting our under-eyes!
Because here’s the thing, glitter loves to migrate, and let’s be honest, a shimmery explosion under your eyes isn’t exactly the look we’re going for. So, how do we keep those glitter gremlins at bay?
Fortress Under-Eye: Shielding Strategies
Here are a couple of ways to shield your under-eye area and prevent glitter fallout:
- Patch Patrol: This is my personal favourite! Under-eye patches are like little miracle workers. They not only hydrate your delicate under-eye area, but they also create a physical barrier that catches any stray glitter speks before they can wreak havoc. Apply them before you start applying your eyeshadow, and then simply peel them off once you’re done.
- Powder Power: No under-eye patches? No problem! Translucent powder is your next best friend. Lightly tap a thin layer of translucent powder under your eyes using a fluffy brush. This will create a barrier that helps catch any glitter fallout. Plus, it helps set your concealer and prevents creasing. Just be sure to dust off the excess powder before moving on to the rest of your makeup.
No matter which method you choose, using a damp brush to apply your glitter eyeshadow can also help minimize fallout!
Glitter Time! Let’s Make Those Hooded Eyes Sparkle!

We’ve prepped, we’ve primed, and we’ve protected our under-eyes. Now comes the application! But before we dive in, let’s talk about the different ways to apply glitter makeup depending on the type of glitter you choose:
5.1 Loose Glitter: Unleashing the Sparkling Beast
As discussed earlier, loose glitter is the OG of the glitter world, offering the most intense sparkle. But with great power comes great responsibility (and a little bit of mess). Here’s how to tame the loose glitter beast:
- Glitter Glue to the rescue: Loose glitter needs a sticky base to adhere to your eyelids. Invest in a good glitter adhesive, it will be your best friend.
- Cotton Swab Hack: Dip a cotton swab into the glitter adhesive and then dab it lightly into your loose glitter pot.
- Precise Application: Now, gently press the cotton swab onto your eyelid, focusing on the desired area. You can use this technique to create a precise line or a diffused effect, depending on your preference.
Tip: Use a damp brush to apply loose glitter for a foiled effect with maximum impact.
Liquid Glitter: Smooth Sailing with Shimmer
Liquid glitter is your one-stop shop for a smooth, high-shine look. It’s easier to apply than loose glitter and offers a more forgiving application process. Here’s how to use it like a pro:
- Finger or Brush? You Decide! Liquid glitter can be applied with your fingers or a medium-sized flat eyeshadow brush. Fingers offer more control for precise application, while a brush helps create a diffused effect.
- Blending Beauty: Once you’ve applied the liquid glitter, use a fluffy blending brush to soften any harsh lines and create a seamless transition with your eyeshadow.
- Sparkle Stacking: Want to kick up the intensity? Layer your liquid glitter on top of a similar coloured eyeshadow for a 3D effect.
Pressed Glitter: Convenience Meets Sparkle
Pressed glitter offers the high-impact shine of loose pigments with the fuss-free application of a pressed shadow. Here’s why it’s a great choice for hooded eyes:
- Less Mess, More Sparkle: Pressed glitter is less messy than loose glitter and easier to control, making it perfect for creating precise lines and defined looks on hooded eyes.
- Brush It On: Use a flat eyeshadow brush to apply pressed glitter for a bold, opaque look. Layer it on for even more intensity.
Sparkle Slayers: Cleaning Up and Finishing Touches!
And that’s it for the glitter application! Those hooded eyes are now sparkling like nobody’s business! But before we strut our sparkly stuff out the door, let’s take a moment to clean up any glitter fallout and add those finishing touches for a flawless, polished look.
Glitter Guerrillas: Eliminating the Escapees
No matter how careful you are, some glitter gremlins might still escape. But fear not, we have some tricks to clean them up!
- Sticky Tape to the Rescue: Use a piece of sticky tape to gently pick up any stray glitter around your under-eye area and on your cheeks.
- Micellar Water Magic: Dampen a cotton swab with micellar water and use it to gently remove any stubborn glitter specks.
Tip: Do your glitter cleanup before applying your mascara and eyeliner to avoid smudging.
Blending Besties: Making Glitter Play Nice
Sometimes, glitter makeup can look a bit harsh next to your matte eyeshadows. But don’t worry, we can fix that!
- Fluffy Brush FTW: Use a clean fluffy brush to gently blend the edges of your glitter where it meets your matte eyeshadows. This will create a seamless transition and a more natural, diffused look.
- Don’t Forget the Crease: Pay special attention to blending in your crease to ensure a smooth, polished finish.
Setting the Sparkle Stage: Making Your Look Last
Now that your glitter makeup is looking flawless, let’s set it in place to ensure it stays put all day long!
- Setting Spray Savior: A good setting spray is your best friend for locking in your makeup and preventing glitter fallout. Spritz your face lightly from a distance to set your masterpiece.
- Loose Powder for Oily Lids: If you have oily lids, you can also use a light dusting of loose powder to further mattify your look and prevent creasing.
Mature Skin? There’s a Concealer You NEED! Discover the BEST concealer for mature skin in my ultimate guide here.
Final Thoughts
We talked about prepping our hooded eyes, choosing the right glitter makeup products, and applying that sparkle like total pros. We even learned some clean-up tricks to keep glitter fallout at bay.
Remember, mastering glitter makeup on hooded eyes might take a little practice and maybe a few glitter-fueled mishaps along the way. But with the right techniques and a touch of patience, you’ll be rocking those sparkling hooded eyes in no time!
So, don’t be afraid to experiment with different glitter types, application methods, and colours. Find what makes you feel confident and fabulous! After all, makeup is all about expressing yourself and having fun.
P.S. Now that you’re a glitter makeup whiz, what’s the most creative way you’d use glitter in your next makeup look?
FAQS
Q: Are hooded eyes a good fit for glitter makeup?
Absolutely! While glitter makeup and hooded eyes can be a tricky combo, with the right techniques and products, you can achieve stunning sparkly looks. This guide will show you exactly how!
Q: What are some common challenges with glitter makeup on hooded eyes?
Glitter can disappear into the crease, migrate throughout the day, and make hooded eyes appear smaller. But fear not, there are ways to overcome these challenges!
Q: What’s the best way to prep hooded eyes for glitter makeup?
Start with a clean, moisturized eyelid and apply an eyeshadow primer specifically formulated for long-wearing and mattifying to prevent creasing.
Q: Should I use loose glitter, liquid glitter, or pressed glitter for hooded eyes?
Each type of glitter makeup has its pros and cons. Loose glitter offers the most intense sparkle but can be messy. Liquid glitter is easier to apply and offers a smooth finish. Pressed glitter combines the sparkle of loose glitter with the ease of a pressed eyeshadow. Experiment and see what works best for you!
Q: How do I prevent glitter fallout on hooded eyes?
There are a few tricks! Apply eyeshadow primer, use a damp brush with loose glitter, and shield your under-eye area with under-eye patches or translucent powder.
Q: How do I clean up glitter fallout after applying glitter makeup?
Use a sticky tape to gently pick up stray glitter and micellar water on a cotton swab for any stubborn specks. Do your glitter cleanup before applying mascara and eyeliner to avoid smudging.
Q: How can I make glitter makeup look more natural on hooded eyes?
Use a fluffy brush to blend the edges of your glitter where it meets your matte eyeshadows. This will create a seamless transition and a more diffused look.
Q: What are some tips for making glitter makeup last longer on hooded eyes?
Set your glitter makeup with a setting spray and use a light dusting of loose powder if you have oily lids.
Q: Alright, I’m ready to get sparkling! What are some fun ways to experiment with glitter makeup?
The possibilities are endless! Try using glitter eyeliner, create a cut crease with glitter, or add a touch of sparkle to your lower lash line. There are no rules, so have fun and express yourself!


Leave a Reply